


Gel Nails at Home: The Complete 2026 Guide to Long-Lasting, Salon-Quality Gel Manicures
Introduction: Why Gel Nails at Home Are the 2026 Standard
The salon experience used to feel irreplaceable — the scent of acetone, the hum of the UV lamp, the satisfying clink of nail tools. but gel nails at home have changed everything in 2026. At-home gel nails are no longer a compromise; they are a deliberate, money-saving, creative choice made by millions of beauty lovers who have mastered the art of the DIY gel manicure.
A professional gel manicure costs between $45 and $90 in most US cities. At that rate, a monthly appointment totals $540 to $1,080 per year — before tips, before travel, before the time invested. A quality home gel kit? Often under $80, with enough product for 20 to 30 full sets. The math is compelling.
But it is not just about the money. Home gel nails give you full creative control — nail art designs, custom color combinations, and nail decorations that you might not even find at your local salon. With the right nail art tools from StarabeautyUSA, salon-quality results are absolutely within reach.
This guide covers everything you need to master gel nails at home — from tools to safe removal, the step-by-step application process, common mistakes and how to avoid them, nail art ideas to try at home, and how to safely remove gel without damaging your natural nails.
What Are Gel Nails? Understanding the Technology Behind Long-Lasting Manicures
Gel nails use a photopolymer formula that cures (hardens) when exposed to UV or LED light. Unlike regular nail polish, which air-dries, gel polish is chemically bonded to the nail surface during curing, creating a durable, chip-resistant finish that lasts two to three weeks with minimal wear.
There are three main types of gel nail products:
1. Soft Gel (Soak-Off Gel)
The most popular type for home use. Soft gel polish looks like regular nail polish but cures under a UV or LED lamp. It is applied in thin layers (base coat, color coat x2, top coat) and soaked off with acetone for removal. Brands like Gelish, OPI GelColor, and CND Shellac fall in this category.
2. Hard Gel (Builder Gel)
Stronger than soft gel and used to add length and structure to natural nails. Hard gel cannot be removed by acetone alone — it must be filed off. Builder gels and gel extensions fall into this category and are slightly more advanced for home use but achievable with practice.
3. Gel-Polish Hybrid (Shellac-Type)
A hybrid formula combining the ease of regular polish with the durability of gel. These formulas are thinner, making them easier to apply evenly. They cure faster and are excellent for beginners.
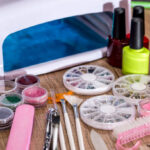
Essential Nail Art Tools for Gel Nails at Home
Your results depend heavily on having the right tools. Attempting gel nails with inadequate equipment leads to poor adhesion, lifting, and uneven curing. Here is exactly what you need:
UV/LED Nail Lamp — The Non-Negotiable
Every gel manicure requires a curing lamp. LED lamps are the preferred choice in 2026: they cure in 30 to 60 seconds per layer (versus 2 minutes for UV lamps), last longer, and work with virtually all gel polish brands. Look for a lamp with at least 36 watts of power for even curing across all five fingers simultaneously.
You can find professional-grade nail dryers and LED lamps at StarabeautyUSA — our curated selection includes options suitable for both beginners and experienced nail artists.
Gel Nail Kit Essentials
- Gel base coat — creates adhesion between the natural nail and gel color
- Gel color polishes — a minimum of 3 to 5 shades to start
- Gel top coat — adds shine, seals color, and prevents chipping
- Gel cleanser or 91%+ isopropyl alcohol — removes the sticky inhibition layer after curing
- Nail primer (optional but recommended for oily nail types)
Nail Prep Tools
- Nail file (180/240 grit) — shapes the nail before application
- Buffer block — smooths ridges on the natural nail surface
- Cuticle pusher — pushes back cuticles for a clean nail plate
- Cuticle nipper — removes excess cuticle skin
- Nail dehydrator — removes oils and moisture from the nail plate for better adhesion
- Lint-free nail wipes — for applying cleanser and dehydrator
Nail Art Tools (For Designs)
For nail decorations and art designs, these tools elevate your gel manicures from simple color to creative expression. Browse the full nail art tools collection at StarabeautyUSA:
- Dotting tools — create precise dots, flowers, and abstract designs
- Nail art brushes (liner, fan, striping) — for lines, gradients, and detailed designs
- Stamping plates and scraper — transfer intricate patterns onto nails in seconds
- Nail glitters and powders — for chrome, holographic, and sparkle effects
- Nail decorations — gems, foils, stickers, and 3D embellishments
Step-by-Step Gel Nails at Home: The Complete Application Process
Follow these steps precisely for a gel manicure that lasts two to three weeks without chipping or lifting.
Step 1: Prepare Your Workspace
Set up in a well-lit area with a stable surface. Lay down a silicone mat or nail art mat to protect surfaces. Have all your tools within reach before you begin — stopping mid-application to search for a tool disrupts the process and can cause errors. Proper prep ensures your gel nails at home last longer.
Step 2: Prep Your Natural Nails
This is the single most important phase for longevity. Poor nail prep is the number one cause of premature lifting and chipping.
- Remove any existing nail polish with non-acetone remover
- Shape nails with a file (square, round, almond, coffin — your choice)
- Gently buff the nail surface with a 240-grit buffer to create slight texture for adhesion
- Push back cuticles with a cuticle pusher — do not cut live skin
- Apply nail dehydrator and allow to dry completely (30 seconds)
- Apply nail primer if using (especially for oily or problem nails prone to lifting)
Critical detail: make sure no oils, lotions, or moisture remain on the nail plate before applying any gel product.
Step 3: Apply the Gel Base Coat
Apply a thin, even layer of gel base coat. Cap the free edge (run the brush along the tip of the nail) to prevent lifting at the tips. Avoid getting base coat on the cuticle or skin — this is a primary cause of lifting.
Cure under LED lamp for 30 to 60 seconds (check your specific base coat’s instructions). Do not wipe after curing.
Step 4: Apply Gel Color — Two Thin Coats
Apply the first layer of gel color in a thin, even coat. Thin coats cure better, last longer, and look more professional than thick ones. Cap the free edge. Cure for 30 to 60 seconds.
Apply the second color coat — this should give full opacity. Cure again for 30 to 60 seconds.
Pro tip: if your color is sheer and needs a third coat for full coverage, apply a third thin layer. Never apply thick coats — they can bubble, wrinkle, or cure unevenly. Cure each layer to keep your gel nails at home smooth and durable.
Step 5: Nail Art (Optional)
This is where creativity takes over. After your second color coat has cured, you can add nail art before applying top coat. Options include:
- Foil transfer: apply foil glue, cure, press foil, peel back to reveal the metallic pattern
- Gel glitter: dab loose glitter onto uncured gel or apply gel glitter polish
- Stamping: apply stamping gel polish to a plate, scrape, stamp, cure
- Nail gems and decorations: apply using a small bead of top coat as adhesive, cure, then seal
Explore our full range of nail decorations and glitters to find the perfect finishing touches for your design.
Step 6: Apply Gel Top Coat
Apply a thin, even layer of gel top coat. Cap the free edge thoroughly. Cure for 60 seconds. The top coat should feel slightly sticky after curing — this is the inhibition layer and is normal.
Wipe the inhibition layer away using a lint-free nail wipe saturated with gel cleanser or 91% isopropyl alcohol. This reveals the full shine of the top coat.
Step 7: Finish and Moisturize
Apply cuticle oil around the nail edges and massage in. This keeps cuticles healthy, prevents hangnails, and makes the finished manicure look polished and professional. Reapply cuticle oil daily for the life of your gel manicure.
Top 6 Gel Nails at Home Art Ideas for 2026
One of the greatest advantages of gel nails at home is the freedom to experiment. Here are the most popular and achievable nail art styles for 2026:
1. Chrome Powder Nails
Chrome powder is applied over cured gel (without wiping the inhibition layer) using a silicone finger or sponge applicator. The friction bonds the chrome particles to the gel, creating a mirror-like metallic finish. Rose gold, silver, holographic, and duo-chrome effects are all achievable.
2. French Tip Gel Nails
The classic French manicure gets a 2026 upgrade: colored tips instead of white, asymmetric tip lines, and glitter French tips. Use a thin striping brush or French tip guides (stickers) to achieve a clean line. Popular variations include black French tips, pastel ombre French, and reverse French (colored base with natural tips).
3. Marble Gel Nails
Apply a white or grey gel base, then use a thin liner brush to draw veining lines in dark grey or gold. Blur slightly with an orange stick. Seal under top coat. The effect is sophisticated and impressively realistic when done with a light hand.
4. Glitter Ombre Gel Nails
Apply a sheer or nude gel base. While wet, dab nail glitter onto the tips using a sponge applicator. Blend gently upward for a gradient effect. Seal with multiple coats of top coat to smooth out any texture from the glitter. The result: a wearable, high-impact finish.
5. Floral Nail Art
Use a small dotting tool to create five small dots in a circular pattern for simple flower designs. For more detailed florals, a fine liner brush loaded with contrasting gel colors creates petals, stems, and leaves. This style is especially popular on accent nails.
10 Gel Nails at Home Mistakes and How to Avoid Them
- Skipping nail prep — always dehydrate and buff before applying any product
- Applying gel too close to cuticles — leave a 1mm gap; product on skin causes lifting
- Applying coats too thick — thin layers cure better and last longer
- Not capping the free edge — sealing the tip with each coat prevents tip wear
- Undercuring — always follow the lamp time specified by your gel brand
- Touching the gel surface between coats — oils from fingers cause adhesion failure
- Using an underpowered lamp — a minimum 36W LED lamp is essential for full curing
- Picking or peeling gel polish — always soak off properly to avoid nail plate damage
- Skipping cuticle oil — daily cuticle oil is essential for healthy nail maintenance
- Reapplying gel over lifting — always remove and redo a lifting nail; layering over a lift causes infection risk
How to Safely Remove Gel Nails at Home Without Damaging Your Natural Nails
Improper removal is the leading cause of nail damage from gel manicures. Never peel, pick, or force gel off your nails — this removes layers of the natural nail plate with it, causing thinning, weakness, and white patches.
The Foil Soak-Off Method (Safest for Natural Nails)
- File the top surface of the gel to break the seal — use a 180-grit file and remove the shine completely
- Soak a small square of cotton wool in 100% acetone
- Place the soaked cotton on the nail and wrap tightly with a small square of aluminium foil
- Wait 10 to 15 minutes
- Gently press and twist the foil to loosen the gel — it should slide off cleanly
- Use an orange stick to gently push off any remaining gel — never force or scrape aggressively
- Apply cuticle oil immediately and allow nails to rest
If gel does not come off easily after 15 minutes, rewrap and wait 5 more minutes. Never force removal.
After Gel Removal: Nail Recovery
After removal, nails are dehydrated and slightly weakened. Apply a nourishing nail treatment or strengthening base coat and avoid applying a new set for at least 24 to 48 hours if nails feel thin or sensitive. Use a cuticle oil twice daily during the recovery period.
Frequently Asked Questions About Gel Nails at Home
How long do gel nails at home last?
With proper prep, gel nails at home last two to three weeks without chipping. Nail growth will show at the base (new growth) after about two weeks, which most people find to be the natural point for a fresh set.
Do I need a UV lamp or LED lamp?
LED lamps are the recommended choice in 2026. They cure faster, last longer, and are compatible with most gel products. A UV lamp will also work but takes significantly longer per coat.According to the Skin Cancer Foundation, UV nail lamps emit low levels of radiation, UV nail lamps emit low levels of UV radiation, and wearing broad-spectrum SPF or UV-protective gloves during curing can reduce any exposure risk.
Are gel nails at home damaging?
When applied and removed correctly, gel nails cause minimal damage. The danger comes from improper removal (picking or peeling) and over-filing during prep. Keep removal gentle, space out sets if nails feel thin, and maintain daily cuticle oil to support nail health.
What is the best gel nail brand for beginners?
Gelish, Beetles Gel Polish, and Makartt are widely recommended beginner-friendly brands with a wide color range, reliable formulas, and accessible pricing. Always use base coat, color, and top coat from the same brand system where possible for best compatibility.
Conclusion: Your Best Gel Nails Start With the Right Tools
Gel nails at home in 2026 are not a compromise — they are a skill. Like any skill, the learning curve is short, and the rewards are significant: long-lasting color, creative freedom, and real savings that add up month after month. Gel nails at home are the ultimate way to achieve salon-quality results while saving money.
The difference between a good home gel manicure and a great one comes down to two things: proper nail prep and quality tools. Cut neither corner, and your results will consistently rival anything you would get at the salon.
Gel nails at home in 2026 are not just a trend — they are the ultimate way to achieve salon-quality results while saving money. With the right StarabeautyUSA tools, your gel nails at home will look flawless every time.
Explore our full range of professional nail art tools, nail gel, nail dryers, nail glitters, and nail decorations at StarabeautyUSA. Whether you are just beginning your gel nail journey or refining your technique, we have the products to take your nails to the next level.
Related Reading:
• 10 Best Nail Art Tools for Salon-Quality Nails at Home (2026)
• 10 Nail Art Trends You Need to Try Right Now
• The Complete Skincare Routine Guide 2026
Published by StarabeautyUSA | Expert Beauty Tips for Nails, Hair, Makeup & Skincare | Shop our full collection | Worldwide Shipping Available
2 thoughts on “Gel Nails at Home: The Complete 2026 Guide to Long-Lasting, Salon-Quality Gel Manicures”
Very informative. Nice products too. I highly recommend.
Very informative